Written by Nate Lawson, DDS
A 16 year old patient presented for treatment of white spot lesions 4 months following debonding of orthodontic brackets. The patient had tried to remineralize the lesions with a calcium phosphate paste with no significant improvement. He sought treatment options from several providers who recommended composite restorations for esthetic improvement of his teeth, but the patient and his mother desired a more conservative option.
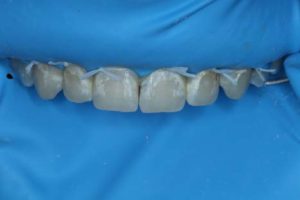
Intraoral exam revealed unesthetic white spot lesions on teeth #5 through #12. Tooth #10 also had small facial cavitation. The patient and mother were informed about the process of resin infiltration and that the outcome would likely improve the esthetic appearance, however, it could not be guaranteed. Also, the importance of using the rubber dam was explained to patient and the risk of HCl leakage through the rubber dam causing temporary blanching of tissue.
A rubber dam was placed on the patient. The holes in the rubber dam were placed slightly further apart than suggested in the template in order to ensure sufficient soft tissue coverage. Teeth were clamped on #4 and #13. Due to the proximity of the white spot lesions to gingival tissue, the floss ties were used to pull the rubber dam cervically. The patients will often note that this is the most uncomfortable part of the procedure. To combat this, topical anesthetic can be used on tissue prior to this procedure.
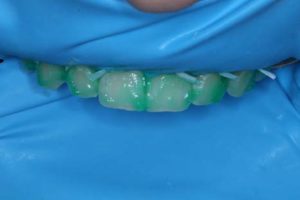
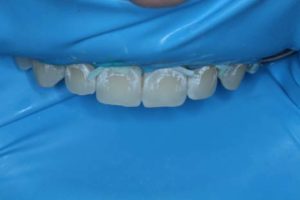
After rubber dam placement, the HCl Icon Etch was applied for 2 minutes.
After a second 2 minute application of HCl etch, the Icon Dry alcohol solution was applied to check for visual improvement (not pictured). Most lesions appeared camouflaged at this point other than teeth #7 and #11. So a third round of etching was performed.
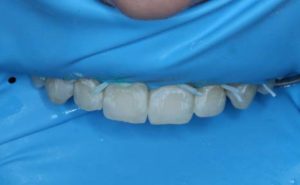
After the third round of etching, Icon Dry was applied and the lesions were almost completely camouflaged. Note that in the picture the lesions appear worse than original when dry, however, when the Icon Dry alcohol or resin Infiltrant are applied, the color improves drastically.
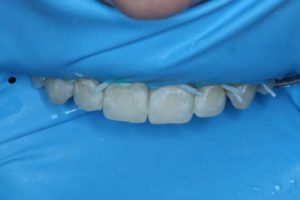
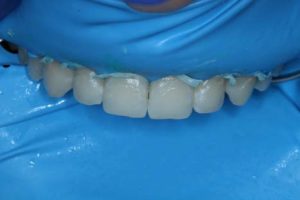
After allowing the Icon Dry to sit for 30 seconds and thoroughly drying the teeth, the resin Icon Infiltrant was applied for 3 minutes. The overhead light was removed and the resin was refreshed every minute. The excess resin was then blown away with an air-water tip and the teeth were flossed. Each tooth was then light cured for 40 seconds. A second round of infiltration was then applied, cured and a scaler was used to remove excess resin.
The patient and his mother were very pleased with the esthetic outcome. The patient had planned to return for a composite restoration for the cavitation on #10.
Interestingly, the cavitation on #10 felt hard to the touch with the tip and the explorer and relatively even with surrounding tooth structure.
We decided to monitor the lesion without surgical intervention at this time.
