By Sable Muntean, DMD, MHSA![]()
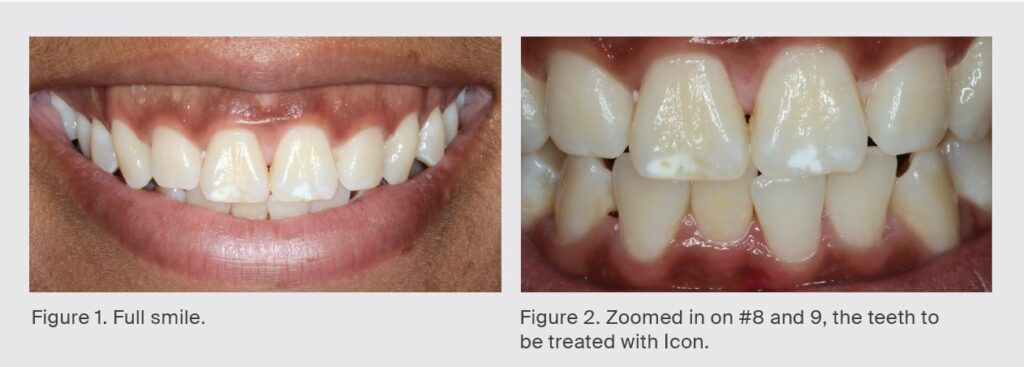
A 22-year-old African American female patient reported to my office with the chief concern of straightening her teeth through orthodontic treatment and receiving any needed dental care. When asked about if she had any issues with the white spot lesions on her maxillary centrals, she shared she did not like their appearance but did not know if anything could be done. We discussed Icon®, a DMG product that uses resin infiltration to virtually make white spot lesions disappear with no use of anesthetic, significant drilling of the teeth, or dental materials that would need replaced later in life. Because the lesion had not yet penetrated too far into the teeth, my patient was the perfect candidate for this procedure.
After going through a series of orthodontic appliances with a specialist, before placing braces, (and just in time for her graduation pictures), my patient was ready for treatment. (Figures 1 and 2).
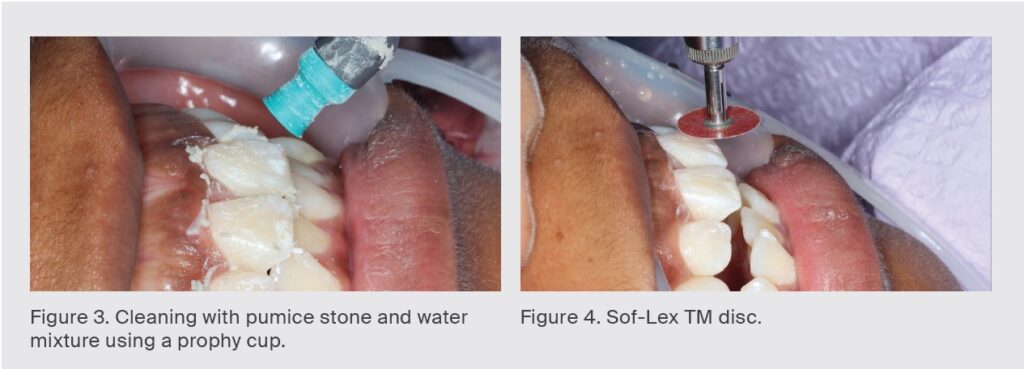
The teeth were cleaned using pumice mixed with water delivered via a prophy brush. (Figure 3). This was followed by a Sof-Lex™ disc used at a minimal speed to allow for a flatter surface with less texture for the materials to penetrate the lesion better. (Figure 4). Please note that this was only used in the portion of the lesions themselves.
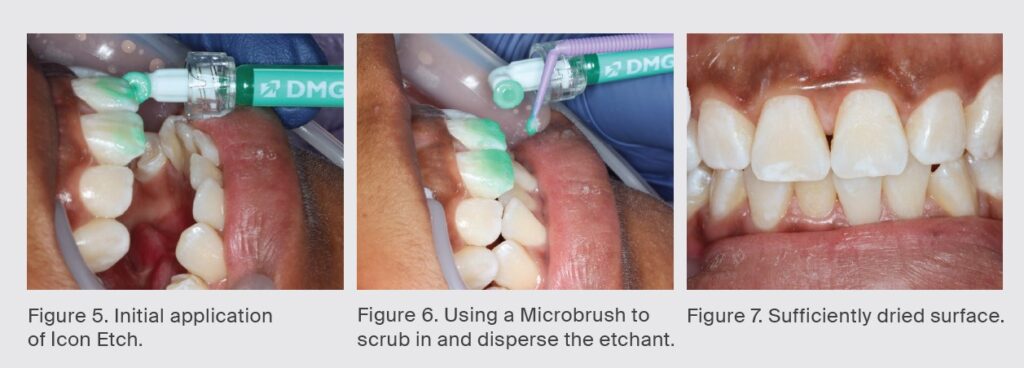
Following this minimal mechanical preparation of the teeth, the Icon-Etch is applied (Figure 5). The initial distribution of etchant does not really count as it is more to clean the tooth after your previous step. Following this, research has shown to etch 3-5 times total. The etch should stay on for two minutes at a time. Mind you this is not the traditional etch that we use when doing a filling. That is 35% phosphoric acid, yet Icon Etch is 15% HCl acid. The alcohol included in the kit is to check to see if it disappears once applied to the surface to see whether you should move on to the resin step.
A microbrush can be used to further distribute the etch around the lesion and its margin (Figure 6). I cannot stress the importance of drying the teeth (Figure 7). This really helps with each step building on to the next one for a better response.
After having had multiple rounds of etching and checking with the alcohol, it’s time for the ultimate magic trick…Icon Infiltrant (Figure 8). The way this works is that the resin resolves the discoloration by filling in porous tissue and matching the refractive index of enamel. This is applied in a slightly thicker layer onto the tooth so it is damp, then more is added every 1 to one-and-a-half minutes. LET THIS SIT ON THE TOOTH. The longer it sits, the better. I would say at least seven minutes, even ten. You will often see the change right before your eyes and watch the lesions disappear. Before curing, lightly floss but make sure the gums do not start to bleed (Figure 9).
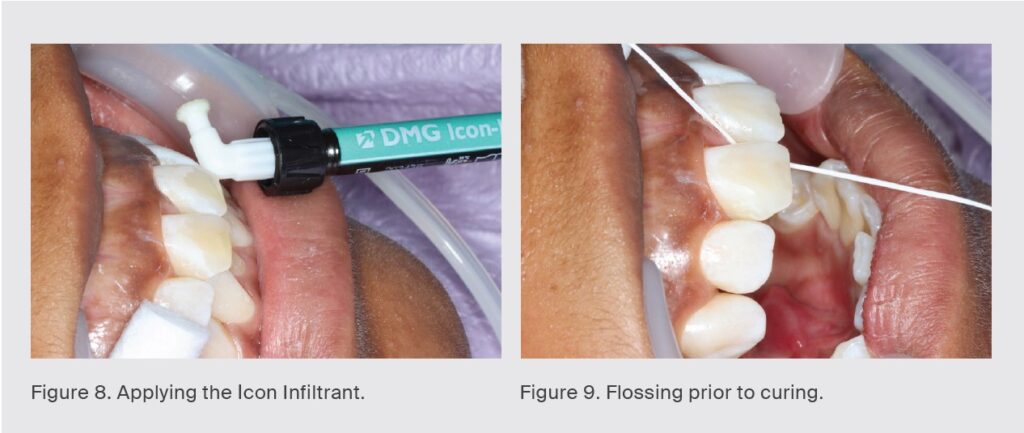
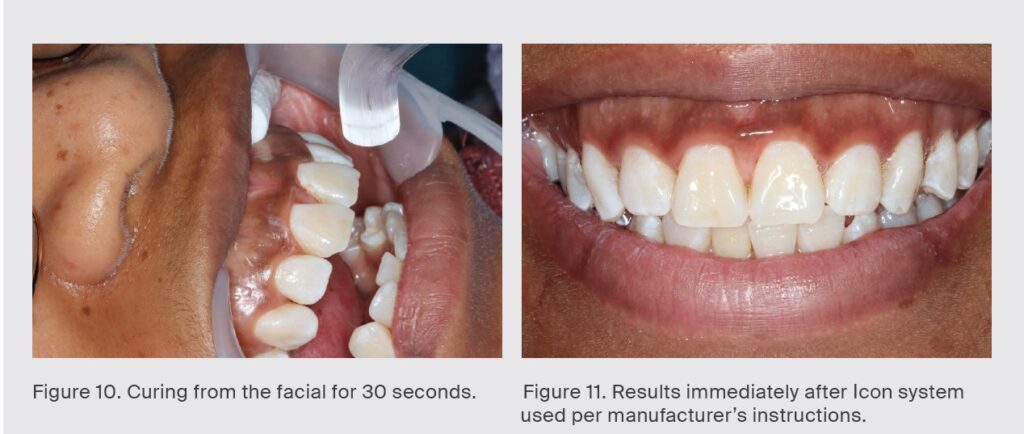
Now it’s time to cure—ten seconds from the lingual and 30 seconds from the facial, about 1-2mm away—remember your patient likely is not numb (Figure 10)!
Once this is complete and you are happy with the result, the tooth can be polished with a brownie or Sof-Lex TM disc.
Then, ta da ! The final product (Figure 11). The patient was absolutely ecstatic! Do not forget to remind the patient that the tooth is very dehydrated at this point. Over time it will look more and more natural as saliva coats it. He or she can eat or drink as normal and my patient was super excited to attend her graduation with her beautiful new smile.
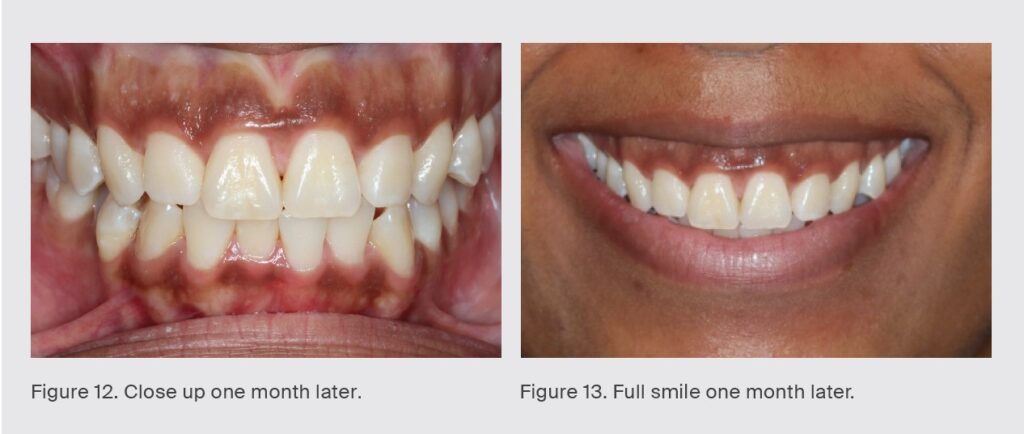
Check out the results one month later—stunning (Figure 12/13)! Talk about an Icon!
