Written by Jack Ringer, DDS, FAACD, FIADFE
Provisional restorations are primarily designed to create a functional restoration while the permanent restoration is being manufactured. Historically, the challenge was to be able to create the restoration in an efficient, inexpensive and esthetic manner. There are situations whereby the dentist requires an extremely durable restoration due to its size (such as a posterior bridge) or where the provisional needs to be in place for a long period of time such as when the patient is undergoing other dental procedures such as orthodontics or periodontal surgery that will not be completed for weeks or months. This paper will describe and illustrate a technique that is not only efficient and inexpensive, but also yields a highly esthetic and durable provisional crown or a bridge that can be performed by the dentist or delegated to a staff member.
Case
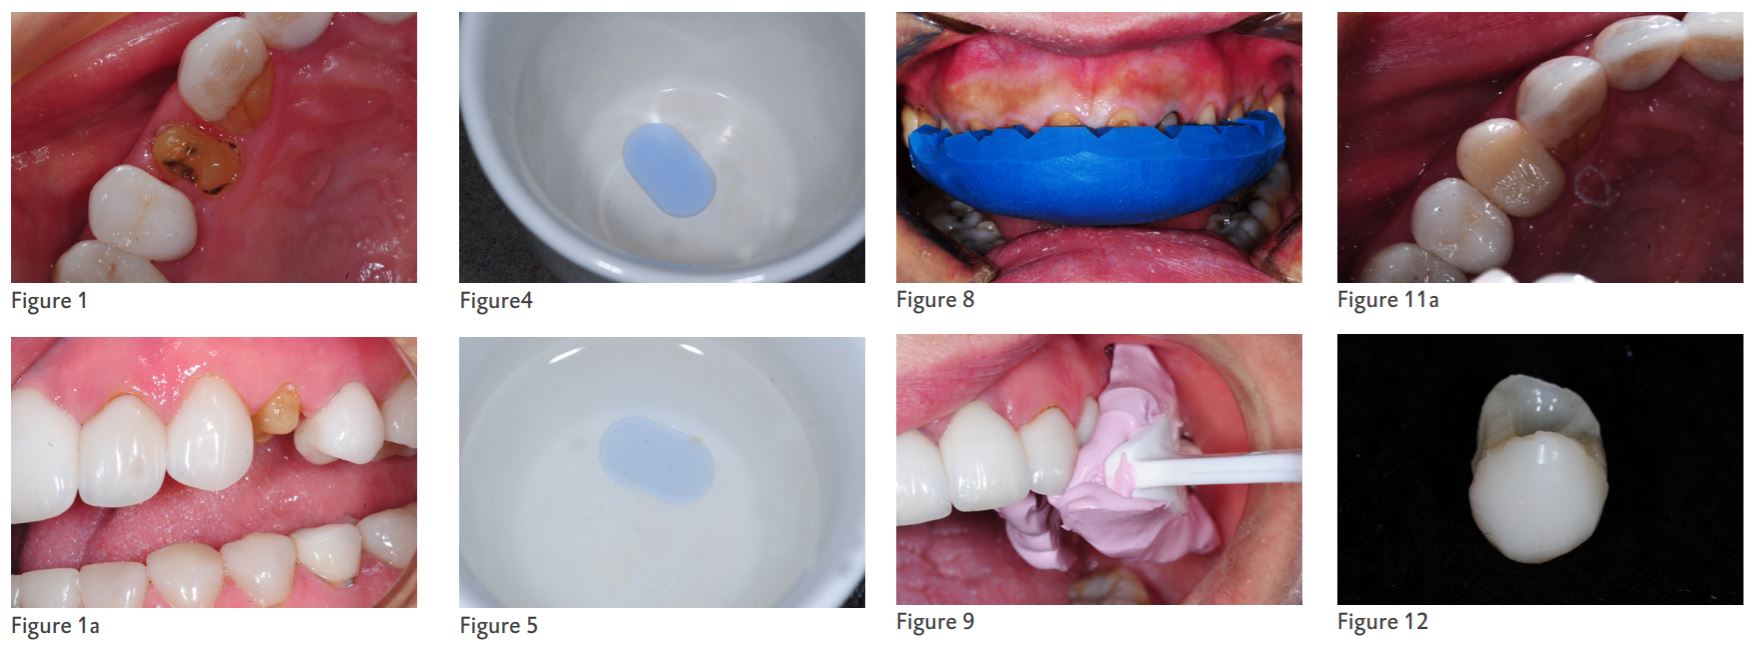
A patient presented with tooth #12 requiring a new full coverage crown due to the existing crown fracturing off (Figs. 1 and 1a). The patient, however, stated that she would be leaving the country the next day for several months. As the final restoration could not be manufactured before the patient departed, it was decided that a strong and esthetic temporary crown would be required.
I utilized a tray impression stint technique by loading a quadrant tray with a polysiloxane material. I then placed it in the quadrant prior to tooth preparation to capture an impression of the pre-operative tooth and the adjacent teeth (Fig. 9). Tooth #12 was built up with composite to establish an acceptable shape and form prior to taking the preliminary impression, as the existing ceramic restoration was fractured off and unusable.
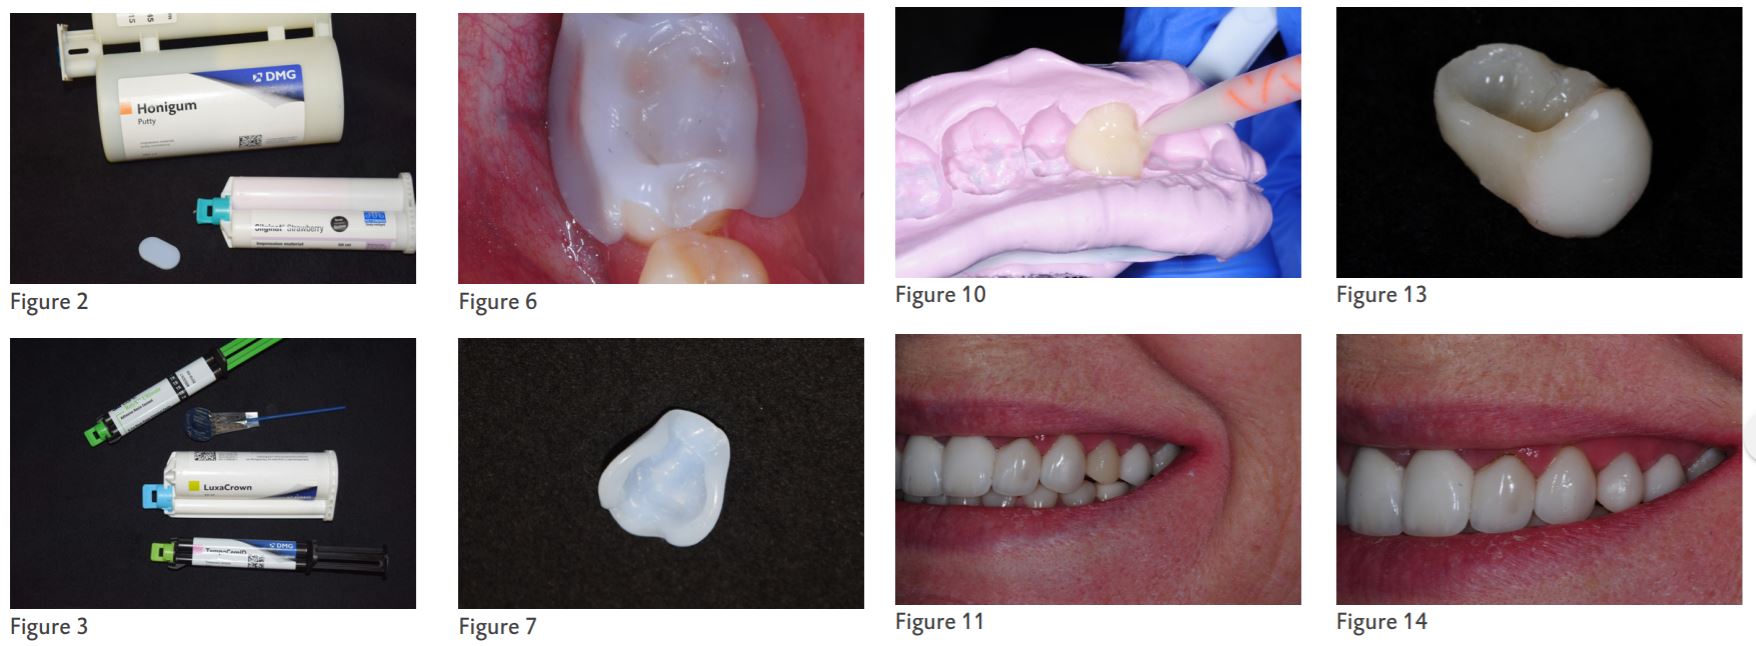
Once the final impression and bite registration were taken, I began making the provisional restoration. First, the tooth was cleaned and dried. Because the objective is just to cement the provisional, no adhesive was necessary. Instead, I simply injected a durable provisional resin (LuxaCrown; DMG) (Fig. 3) into the polysiloxane impression (Fig. 10) and then gently seated the crown onto the tooth. Before the material auto-cured, the excess material was wiped away.
I then removed the provisional from the mouth, trimmed it, and placed it back in the mouth to make any necessary bite adjustments (Figs. 11 and 11a). The provisional was then polished (Figs. 12 and 13) and cemented (TempCem ID; DMG) (Fig. 3).
The patient was happy with the appearance and comfort of the provisional (Fig. 14), which held up extremely until it was replaced with the final restoration several months later.
Discussion
Prior to any tooth preparation, the operator should ensure that the tooth to be prepared has acceptable shape and form. If it does not, the operator should sculpt composite material to create an acceptable tooth form. This is essential so the operator can manufacture a stint that will be utilized to create the provisional once the tooth is prepared.
In the above case, the stint technique involved taking a tray impression using a polyvinyl siloxane impression material. However, it is also possible to perform this procedure using two alternative stint techniques. One of these alternatives involves using thermoplastic buttons (such as Temp Tabs; Alldent). For this technique, the operator will place the hard semi-opaque thermoplastic button in a cup of boiling water, causing it to become soft and transparent in a matter of a few minutes. At this point the heated button will be removed from the water and molded around the tooth/teeth to be prepared and extended partially to the teeth adjacent to each side of the tooth/teeth to be prepped (Figs. 4, 5 and 6). Once the button cools in the mouth, it becomes hard and semi-opaque. At this point, the button is set aside until the operator is ready to fabricate the provisional. (Fig. 7)
The other alternative technique for making the stint is to use a putty material (such as Honigum; DMG) (Fig. 2) to capture an impression of the pre-operative tooth. The putty is mixed and then sculpted on the pre-operative tooth and extended to the adjacent teeth so the stint will be stabile once seated on the prepared tooth. (Fig. 8)


